### MobaXterm 접속 > rac1 > oracle
[oracle@rac1 ~]$ cd /media/sf_shared/
[oracle@rac1 sf_shared]$ ll
drwxrwx--- 1 root vboxsf 4096 Mar 5 09:51 database
drwxrwx--- 1 root vboxsf 0 Mar 5 09:52 linux_11gR2_grid
[oracle@rac1 sf_shared]$ cd database/
[oracle@rac1 database]$ ls
doc install response rpm runInstaller sshsetup stage welcome.html
> 디렉터리 접속이 안되면 권한 수정
chmod -R 775 /media/sf_shared/database
> 공유폴더는 VM용. FTP 사용에 더 익숙해지자.
[oracle@rac1 database]$ db_env
[oracle@rac1 database]$ echo $ORACLE_HOME
[oracle@rac1 database]$ echo $ORACLE_SID
racdb1
[oracle@rac1 database]$ cd
[oracle@rac1 ~]$ ls -a
. .bash_logout .db_env .mozilla .viminfo
.. .bash_profile .emacs oradiag_oracle .Xauthority
.bash_history .bashrc .grid_env .ssh .zshrc
-- DB S/W 설치 시 사용할 환경설정
[oracle@rac1 ~]$ cat .db_env
export ORACLE_SID=racdb1
export ORACLE_HOME=$DB_HOME
export PATH=$ORACLE_HOME/bin:$ORACLE_HOME/OPatch:$GRID_HOME/bin:$BASE_PATH
export LD_LIBRARY_PATH=$ORACLE_HOME/lib:/lib:/usr/lib
export CLASSPATH=$ORACLE_HOME/JRE:$ORACLE_HOME/jlib:$ORACLE_HOME/rdbms/jlib
-- 약칭 등록
[oracle@rac1 ~]$ cat .bashrc
...
alias grid_env='. ~/.grid_env'
alias db_env='. ~/.db_env'
### Putty > rac2 > oracle 에서도 수행
[oracle@rac2 ~]$ db_env
[oracle@rac2 ~]$ echo $ORACLE_HOME
[oracle@rac2 ~]$ echo $ORACLE_SID
racdb2
[oracle@rac2 ~]$ cd
[oracle@rac2 ~]$ ls -a
. .bash_history .bash_profile .db_env .grid_env .ssh .Xauthority
.. .bash_logout .bashrc .emacs .mozilla .viminfo .zshrc
[oracle@rac2 ~]$ cat .db_env
export ORACLE_SID=racdb2
export ORACLE_HOME=$DB_HOME
export PATH=$ORACLE_HOME/bin:$ORACLE_HOME/OPatch:$GRID_HOME/bin:$BASE_PATH
export LD_LIBRARY_PATH=$ORACLE_HOME/lib:/lib:/usr/lib
export CLASSPATH=$ORACLE_HOME/JRE:$ORACLE_HOME/jlib:$ORACLE_HOME/rdbms/jlib
[oracle@rac2 ~]$ cat .bashrc
...
alias grid_env='. ~/.grid_env'
alias db_env='. ~/.db_env'
> 각 노드의 인스턴스명 확인.
> 각 .db_env 활성화 후 DB 설치 진행하자.
### MobaXterm 접속 > rac1 > oracle
[oracle@rac1 ~]$ cd /media/sf_shared/database/
[oracle@rac1 database]$ ls
doc install response rpm runInstaller sshsetup stage welcome.html
[oracle@rac1 database]$ db_env
[oracle@rac1 database]$ echo $ORACLE_SID
racdb1
[oracle@rac1 database]$ ./runInstaller
##### Oracle Database 11g Release 2 Installer - Installing database (Oracle S/W)
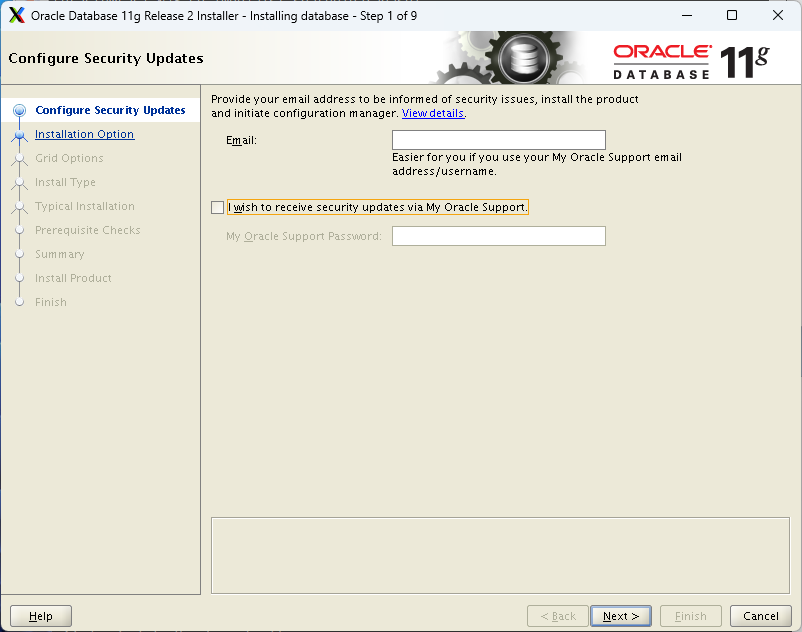
Step 1. Configure Security Updates
> 오라클 서포트 : 라이센스 있어야 가능하다.
> TEST용이니 체크 해제

Step 2. Select Installation Option
2) Install database software only 선택

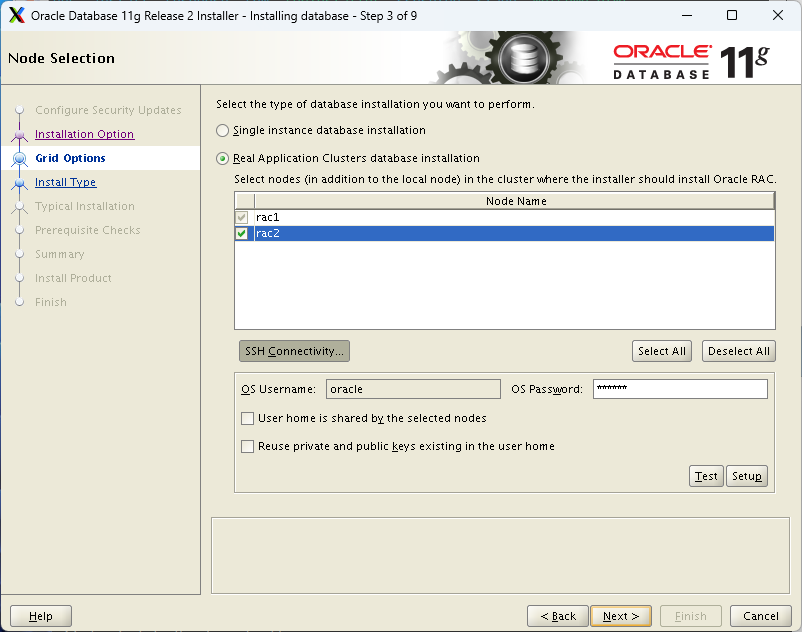
Step 3. Node Selection
2) Real Application Clusters database installation 선택
- rac1, rac2 모두 선택
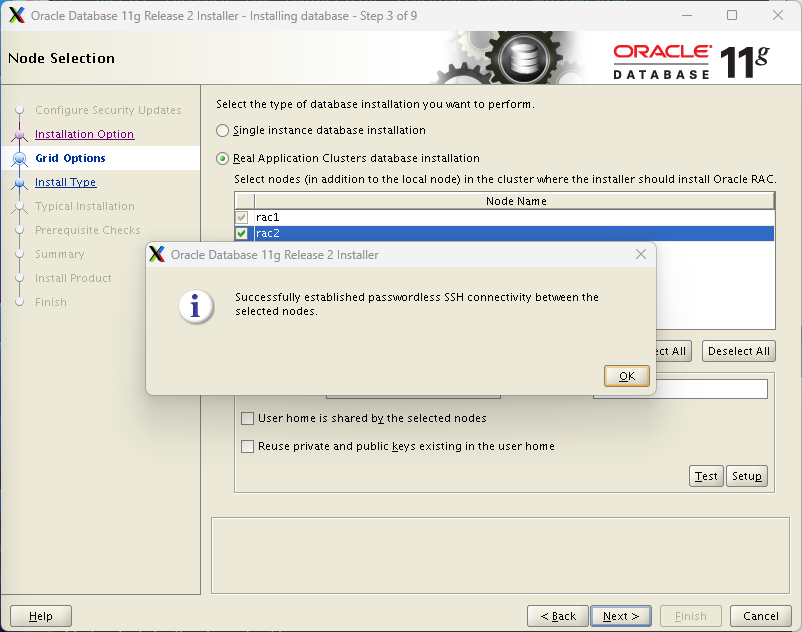
SSH Connectivity...
- OS Password : oracle
- Setup > ... wait > Successfully ... > OK
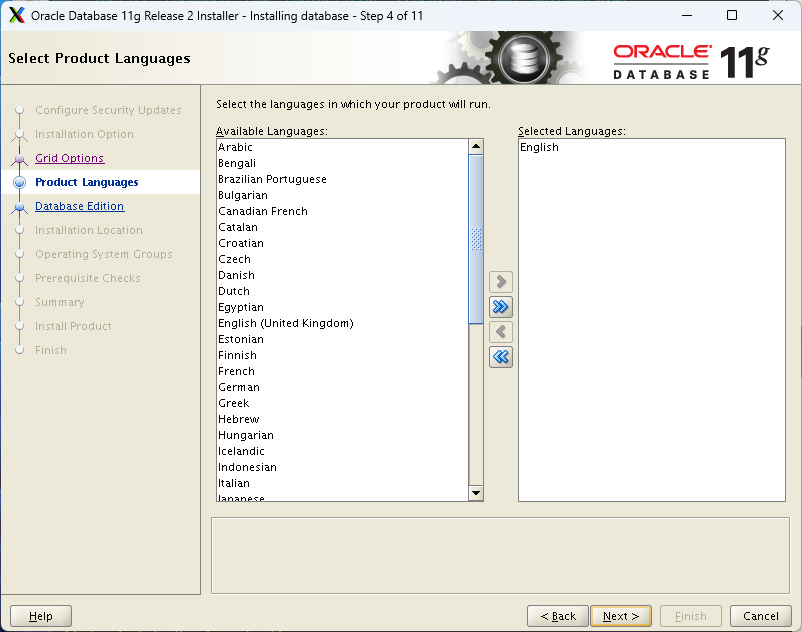
Step 4. Select Product Languages
Selected Languages : English
Step 5. Select Database Edition
2) Standard Edition 선택
> Enterprise Edition의 경우 서버, CPU 4개 이상이면 사용. 옵션의 경우 모두 별도 라이센스

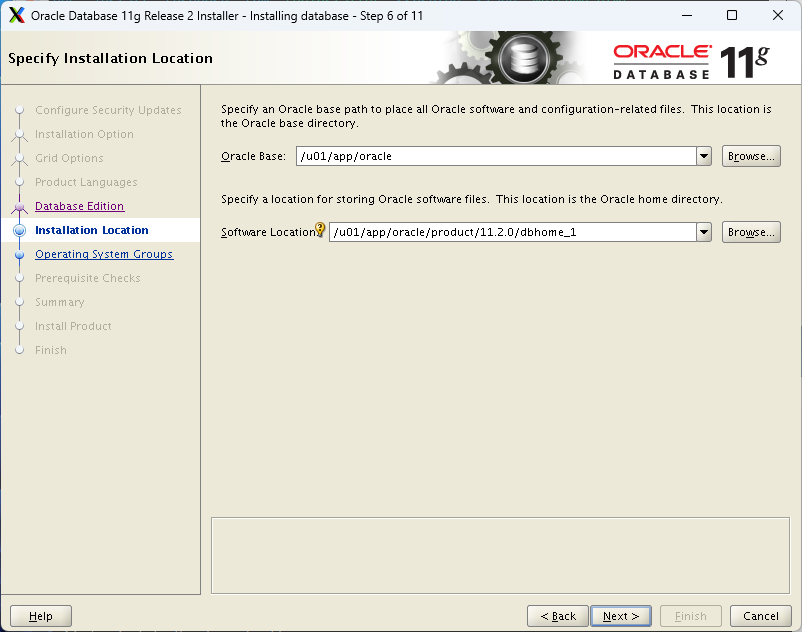
Step 6. Specify Installation Location
Oracle Base : /u01/app/oracle
Software Location : /u01/app/oracle/product/11.2.0/dbhome_1
> dbhome_2 -> dbhome_1 : 디렉터리가 잘 못 되어있는경우가 있다. 꼭 수정하자.
Step 7. Privileged Operating System Groups
Database Administrator (OSDBA) Group : dba
Database Operator (OSOPER) Group : oper
> 오라클 리눅스를 사용하기 때문에 기본으로 설정되어있다.
> 다른 OS를 사용한다면 직접 설정하자.

Step 8. Perform Prerequisite Checks
필수 구성 요소 확인
- Architecture FAILED
- Package: kernel-headers-2.6.18 FAILED
This is a prerequisite condition to test whether the package "kernel-headers 2.6.18" is available on the system.
(more details). Check Failed on Nodes: [rac2, rac1]
> 아키텍처는 만들지 않았으니 나오는게 맞다
> 패키지는 메모해두고 추후에 설치해놓자.
> Ignore All 체크하고 넘어간다.


Step 9. Summary
Finish

Step 10. Install Product
> 패키지가 없다고하면 찾아서 설치하면 된다.
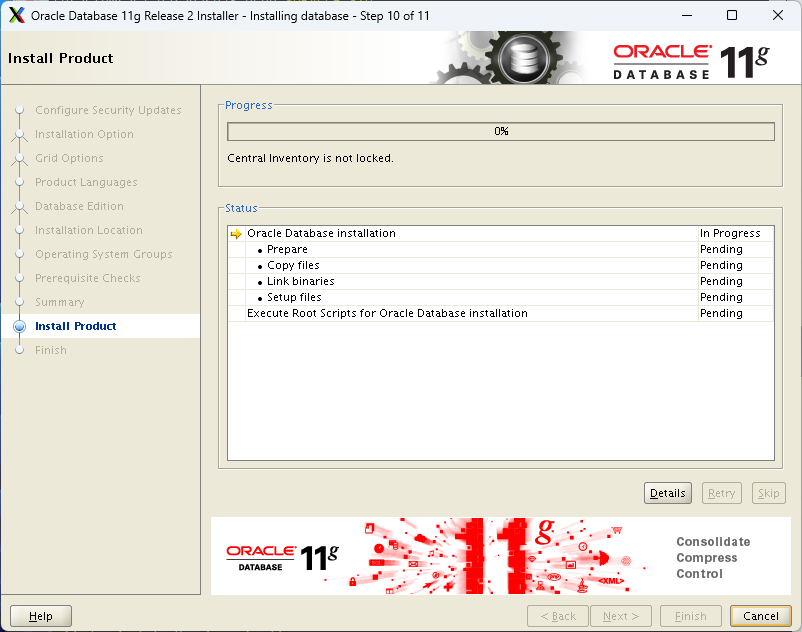
# Error in invoking target ... 버튼을 누르기 전에 파일을 수정하자.
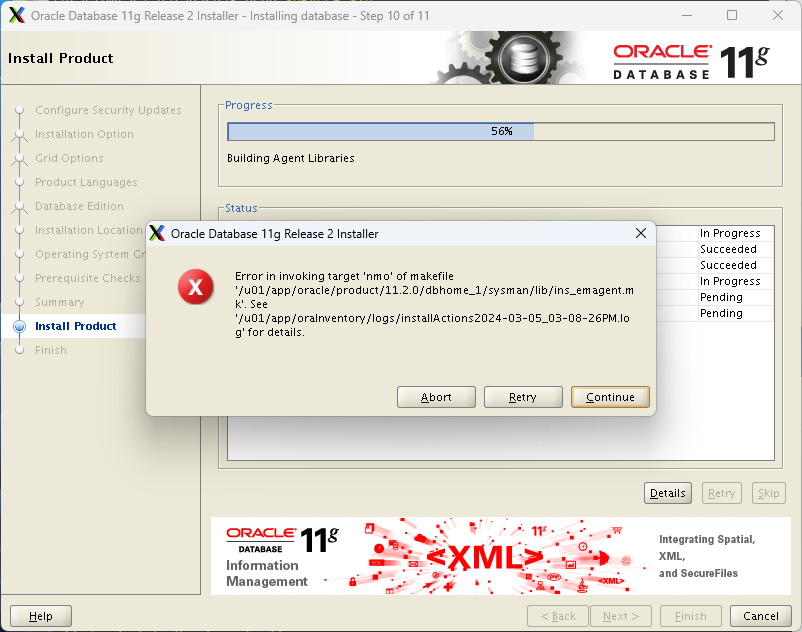
Error in invoking target 'nmo' of makefile '/u01/app/oracle/product/11.2.0/dbhome_1/sysman/lib/ins_emagent.mk'.
See '/u01/app/oraInventory/logs/installActions2024-03-05_03-08-26PM.log' for details.
--- 파일 수정
[oracle@rac1 ~]$ vi /u01/app/oracle/product/11.2.0/dbhome_1/sysman/lib/ins_emagent.mk
--- 문자열 찾기
/emdctl
171 #===========================
172 # emdctl
173 #===========================
174
175 $(SYSMANBIN)emdctl:
176 $(MK_EMAGENT_NMECTL)
↓
176 $(MK_EMAGENT_NMECTL) -lnnz11
: 수정 후 저장
> Retry 두 번은 눌러보고 > Continue
Error in invoking target 'agent nmhs' of makefile '/u01/app/oracle/product/11.2.0/dbhome_1/sysman/lib/ins_emagent.mk'.
See '/u01/app/oraInventory/logs/installActions2024-03-05_03-08-26PM.log' for details.
Error in invoking target 'nmb' of makefile '/u01/app/oracle/product/11.2.0/dbhome_1/sysman/lib/ins_emagent.mk'.
See '/u01/app/oraInventory/logs/installActions2024-03-05_03-08-26PM.log' for details.
> 이름은 다르지만 같은 파일이다.
> Retry > Continue
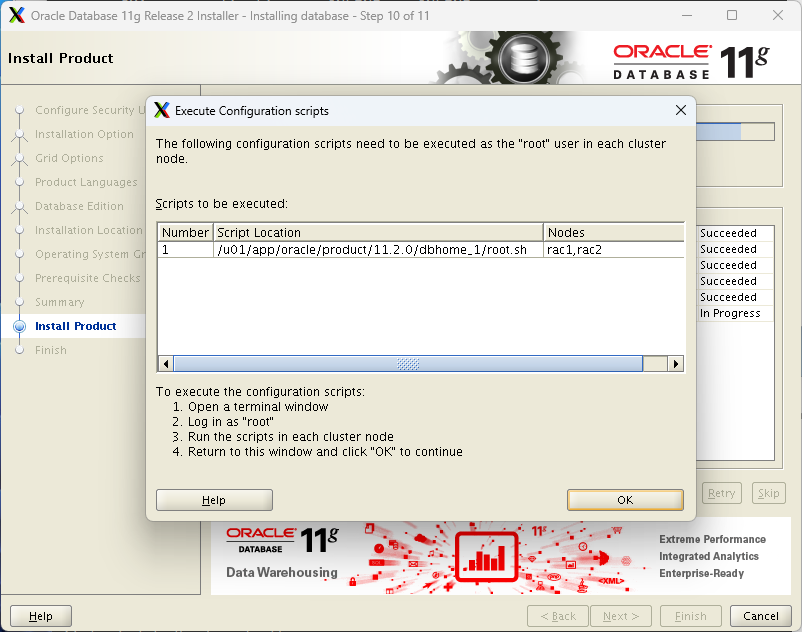
# Execute Configuration scripts
Scripts to be executed:
1. 터미널 실행
2. root 접속
3. rac1에서 스트립트 수행 완료 후 rac2에서 스크립트 수행
/u01/app/oracle/product/11.2.0/dbhome_1/root.sh
4. 완료되면 OK버튼
### Putty > rac1 > root
[root@rac1 ~]# /u01/app/oracle/product/11.2.0/dbhome_1/root.sh
Running Oracle 11g root.sh script...
The following environment variables are set as:
ORACLE_OWNER= oracle
ORACLE_HOME= /u01/app/oracle/product/11.2.0/dbhome_1
Enter the full pathname of the local bin directory: [/usr/local/bin]:
The file "dbhome" already exists in /usr/local/bin. Overwrite it? (y/n) 엔터
[n]:
The file "oraenv" already exists in /usr/local/bin. Overwrite it? (y/n) 엔터
[n]:
The file "coraenv" already exists in /usr/local/bin. Overwrite it? (y/n) 엔터
[n]:
Entries will be added to the /etc/oratab file as needed by
Database Configuration Assistant when a database is created
Finished running generic part of root.sh script.
Now product-specific root actions will be performed.
Finished product-specific root actions.
### Putty > rac2 > root
[root@rac2 ~]# /u01/app/oracle/product/11.2.0/dbhome_1/root.sh
Running Oracle 11g root.sh script...
The following environment variables are set as:
ORACLE_OWNER= oracle
ORACLE_HOME= /u01/app/oracle/product/11.2.0/dbhome_1
Enter the full pathname of the local bin directory: [/usr/local/bin]:
The file "dbhome" already exists in /usr/local/bin. Overwrite it? (y/n) 엔터
[n]:
The file "oraenv" already exists in /usr/local/bin. Overwrite it? (y/n) 엔터
[n]:
The file "coraenv" already exists in /usr/local/bin. Overwrite it? (y/n) 엔터
[n]:
Entries will be added to the /etc/oratab file as needed by
Database Configuration Assistant when a database is created
Finished running generic part of root.sh script.
Now product-specific root actions will be performed.
Finished product-specific root actions.
> OK
Step 11. Finish

# 데이터베이스 생성하기 전에 ASM Disk Group 생성
데이터 그룹은 그리드 설치할때만들었고
아카이브모드, 플래시백.. 등 asm에 구성하기 위해 asm 디스크 그룹 생성
##### MobaXterm 접속 > rac1 > oracle
[oracle@rac1 ~]$ grid_env
[oracle@rac1 ~]$ echo $ORACLE_SID
+ASM1
> 인스턴스로 접근해야한다.
[oracle@rac1 ~]$ . oraenv
ORACLE_SID = [+ASM1] ? 엔터
The Oracle base for ORACLE_HOME=/u01/app/11.2.0/grid is /u01/app/oracle
> grid_env 수행으로 그리드 환경으로 변경했기 때문에 나온다.
[oracle@rac1 ~]$ asmca
> 꼭 그리드 환경에서 실행해야한다.
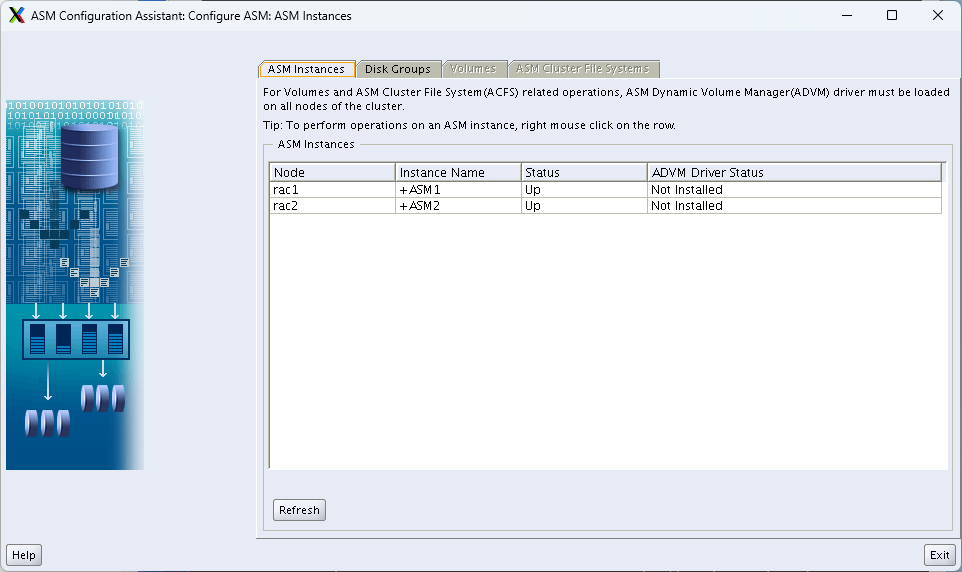
##### ASM Configuration Assistant: Configure
** 창이 나왔는데 화면이 안나온다면 창크기를 조절해보자.
# ASM Instances
# GroupsDisk
Create
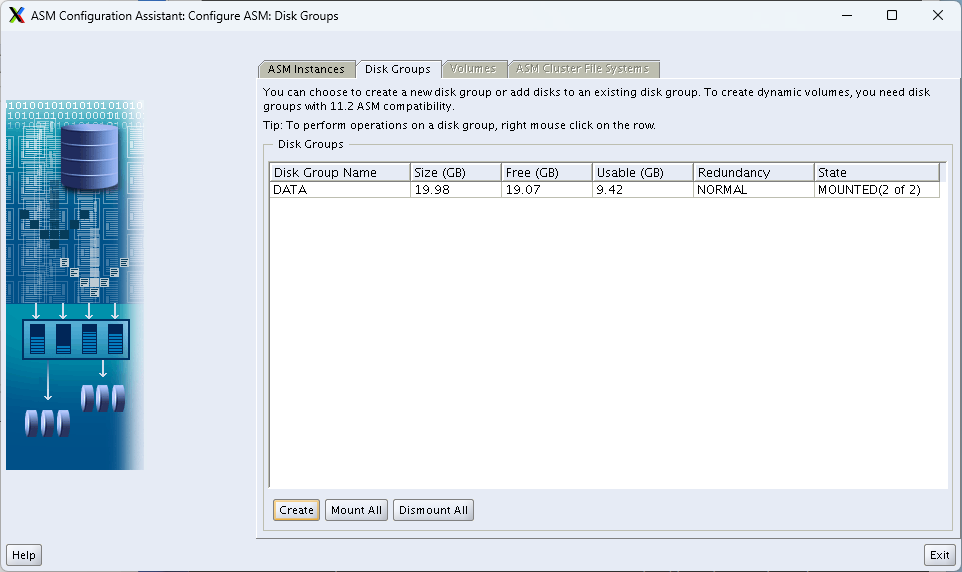
- Disk Group Name : FRA
- Redundancy : External (None)
- Select Member Disks > 디스크 2개 체크 (ASMDISK05, ASMDISK06)
- OK

중간에 잠깐 wait 창 나옴
successfully > OK

Exit

Yes

예시) emp 테이블, DATA 디스크 그룹(디스크 4개 구성)
- External : 테이블을 4등분하여 관리 > 디스크 1개 파손되면 데이터 깨짐
- Normal : External + 테이블 4등분을 각 다른 디스크에 추가로 미러링 (이중화)
> 1개가 망가져도 이중화 데이터가 있다. 단, 그 만큼 디스크가 많이 필요하다.
# 데이터베이스 생성
[oracle@rac1 ~]$ db_env
[oracle@rac1 ~]$ echo $ORACLE_SID
racdb1
[oracle@rac1 ~]$ . oraenv
ORACLE_SID = [racdb1] ? 엔터
ORACLE_HOME = [/home/oracle] ? /u01/app/oracle/product/11.2.0/dbhome_1
The Oracle base for ORACLE_HOME=/u01/app/oracle/product/11.2.0/dbhome_1 is /u01/app/oracle
> 그리드는 자동으로 나오는데.. db는 안나오니 확인하자.
[oracle@rac1 ~]$ dbca
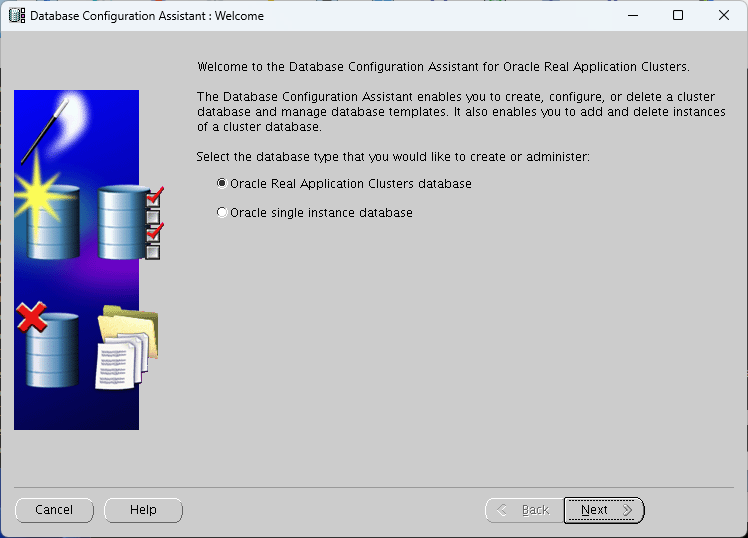
##### Database Configuration Assistant (RAC용 DB 생성)
Welcome
1) Oracle Real Application Clusters database 선택
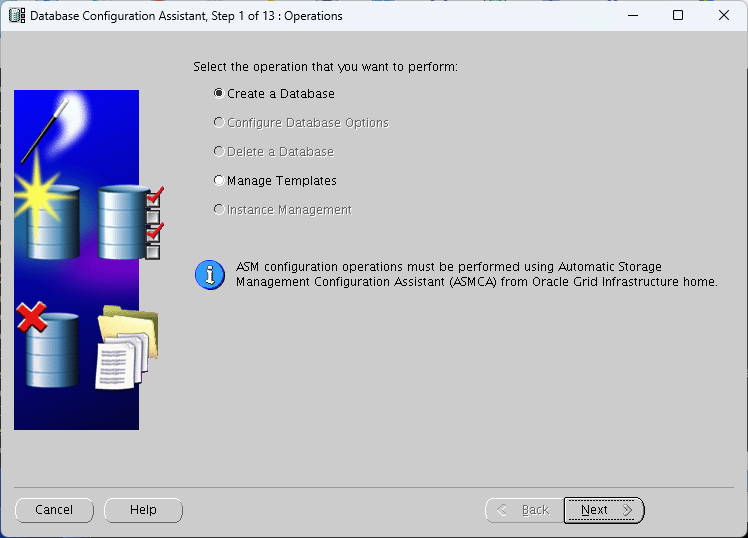
Step 1 of 13 : Operations
Create a Database
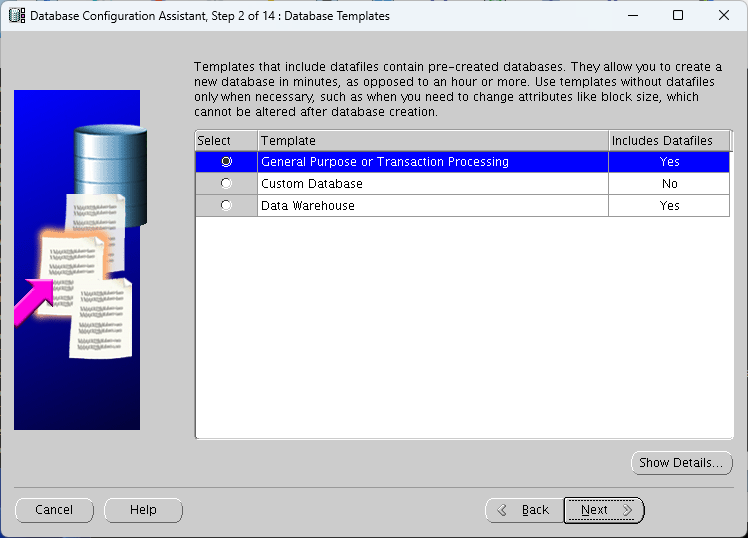
Step 2 of 14 : Database Templates
1) General Purpose or Transaction Processing 선택
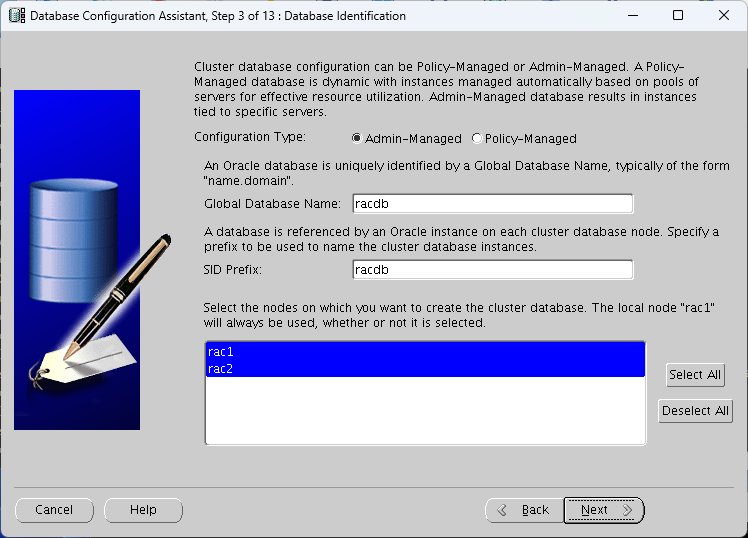
Step 3 of 13 : Database Identification
Configuration Type : Admin-Managed
Global Database Name : racdb
SID Prefix : racdb
Select All > rac1. rac2 선택
> 안하면 1개에만 설치 된다.
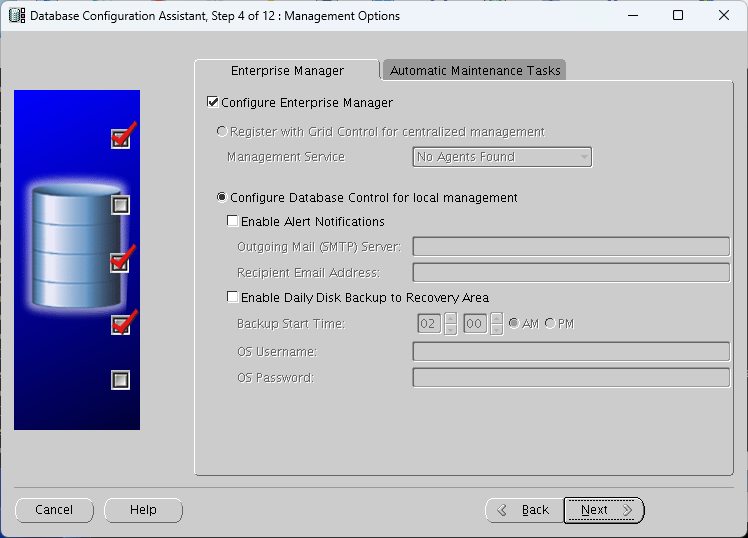
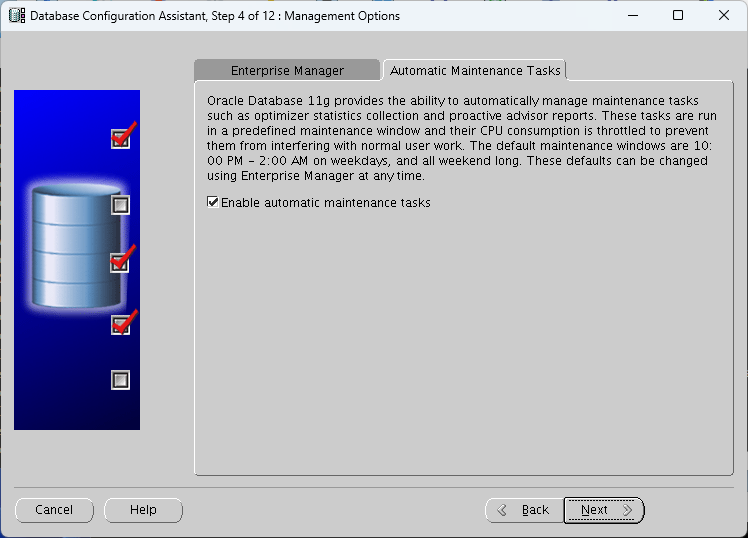
Step 4 of 12 : Management Options
Enterprise Manager
- Configure Enterprise Manager 체크 (기본값)
Automatic Maintenance Tasks : 자동 통계수집
- Enable automatic maintenance tasks 체크 (기본값)
> 라이센스 기능. 유료 옵션
Step 5 of 12 : Database Credentials
2) Use Different Administrative Passwords : oracle
통합비번 사용 > Yes


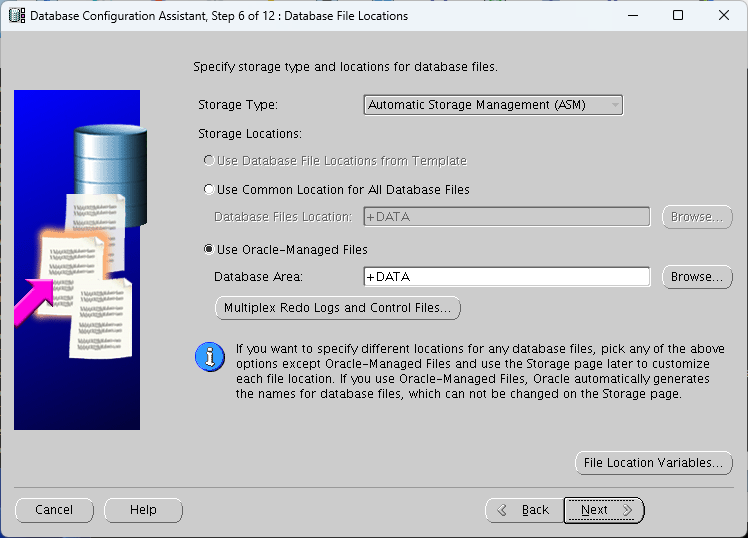
Step 6 of 12 : Database File Locations
Storage Type : Automatic Storage Management (ASM) 고정
2) Use Oracle-Managed Files 선택
Database Area:+DATA
> 컨트롤파일,리두 등 여기에 생성하겠다
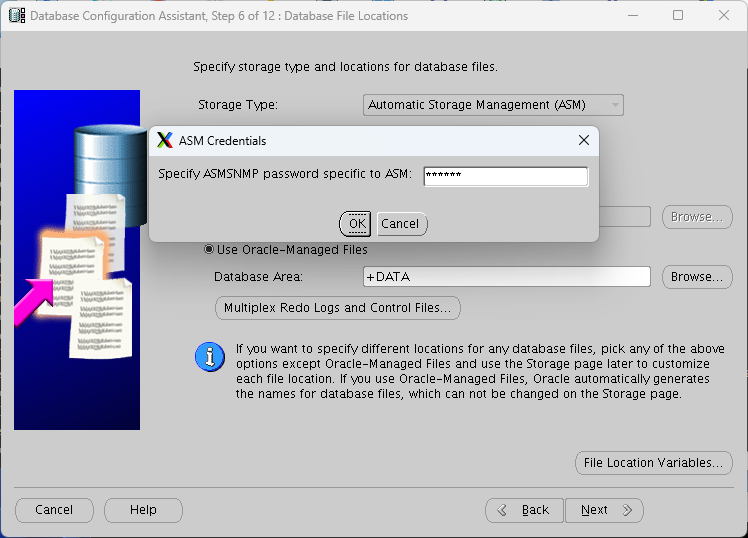
# ASM Credentials
Specify ASMSNMP password specific to ASM : oracle
> 창에 내용이 안나온다면 창크기를 조절해보자
Step 7 of 12 : Recovery Configuration
Specify Flash Recovery Area 체크 (기본값)
- Flash Recovery Area : +FRA
Enable Archiving 체크

Step 8 of 12 : Database Content
SchemasSample 체크

Step 9 of 11 : Initialization Parameters
Memory
- Typical (기본값)
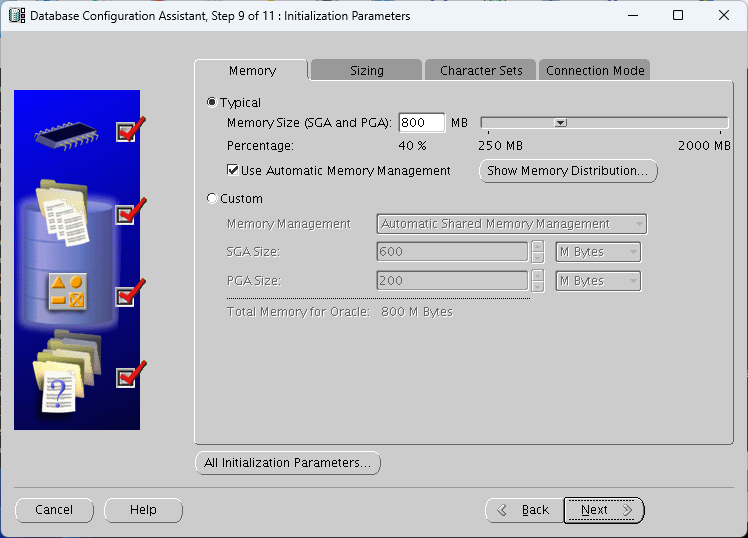
Sizing
> 프로세스 개수도 유료 기능이다.(유저 프로세스, 백그라운드 프로세스 포함)

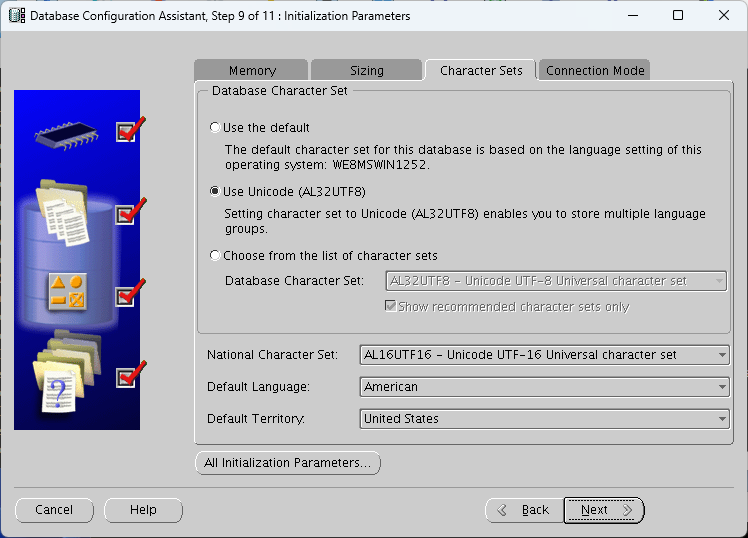
Character Sets
Database Character Set
2) Use Unicode (AL32UTF8) 선택
> varchar2, char Type 에 영향을 주는 Set
> Use the default : 영어만 가능하다.
> UnicodeUse : 전세계 출판문자 기준
> Choose from the list of character sets : 자국언어 기준. 한국어 선택 시 한글,영어,한자,일어 정도 가능, 나머지 깨짐
(KO16MSWIN949 - MS Windows Code Page 949 Korean)
> National Character Set : AL16UTF16 - Unicode UTF-16 Universal character set
(이거 덕분에 아랍어도 사용 가능하다)
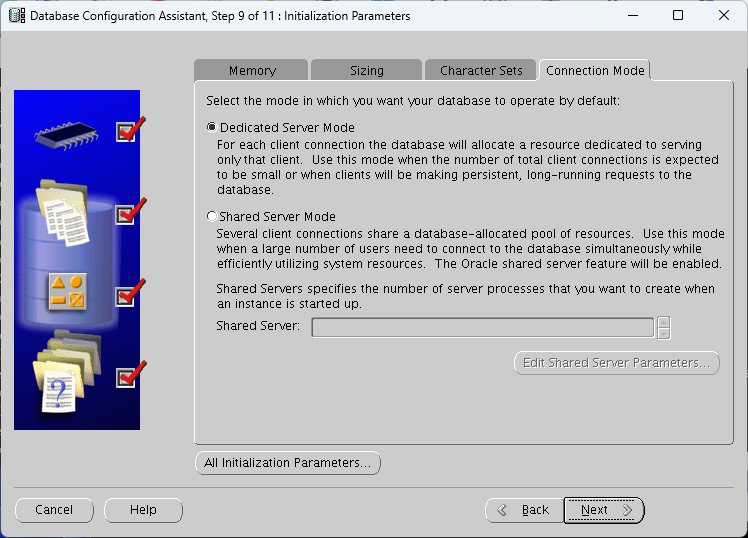
ModeConnection
Operate by default :
1) Dedicated Server Mode 선택 (기본값)
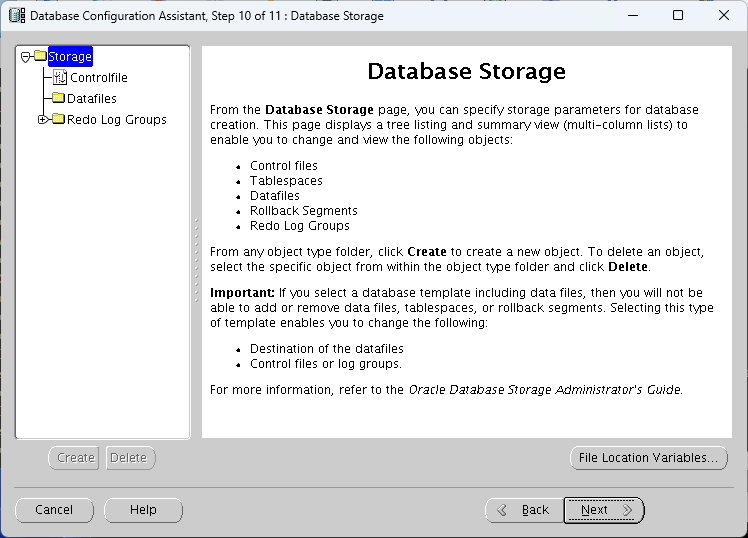
Step 10 of 11 : Database Storage
Controlfile, Datafiles. Redo Log Groups 확
Options Creation : 11 of 11 Step
Select the database creation options:
- Create Database 체크 (기본값)
Finish

Summary
OK


Warning
Enterprise manager configuration succeeded with the following warning -
...
그냥 OK

Exit
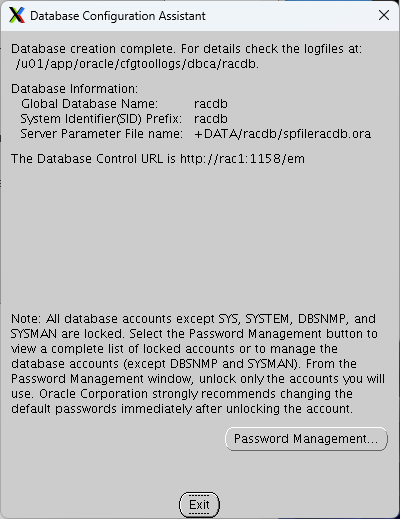
Database creation complete.
> 드디어 모든 설치가 끝났다..
##### Putty 접속 > rac1 > oracle
[oracle@rac1 ~]$ . oraenv
ORACLE_SID = [racdb1] ? 엔터
ORACLE_HOME = [/home/oracle] ? /u01/app/oracle/product/11.2.0/dbhome_1
The Oracle base for ORACLE_HOME=/u01/app/oracle/product/11.2.0/dbhome_1 is /u01/app/oracle
[oracle@rac1 ~]$ sqlplus / as sysdba
...
Connected to:
Oracle Database 11g Release 11.2.0.1.0 - Production
With the Real Application Clusters and Automatic Storage Management options
SQL> select instance_name from v$instance;
INSTANCE_NAME
----------------
racdb1
SQL> select name from v$database;
NAME
---------
RACDB
##### Putty 접속 > rac2 > oracle
[oracle@rac2 ~]$ . oraenv
ORACLE_SID = [racdb2] ? 엔터
ORACLE_HOME = [/home/oracle] ? /u01/app/oracle/product/11.2.0/dbhome_1
The Oracle base for ORACLE_HOME=/u01/app/oracle/product/11.2.0/dbhome_1 is /u01/app/oracle
[oracle@rac2 ~]$ sqlplus / as sysdba
...
Connected to:
Oracle Database 11g Release 11.2.0.1.0 - Production
With the Real Application Clusters and Automatic Storage Management options
SQL> select instance_name from v$instance;
INSTANCE_NAME
----------------
racdb2
SQL> select name from v$database;
NAME
---------
RACDB
# 접속 시 마다 경로입력 > 고정하기 (rac1, rac2 각각 수정)
[oracle@rac1 ~]$ vi /etc/oratab
+ASM1:/u01/app/11.2.0/grid:N # line added by Agent
racdb:/u01/app/oracle/product/11.2.0/dbhome_1:N # line added by Agent
↓
+ASM1:/u01/app/11.2.0/grid:Y # line added by Agent
racdb:/u01/app/oracle/product/11.2.0/dbhome_1:N # line added by Agent
racdb1:/u01/app/oracle/product/11.2.0/dbhome_1:N # line added by Agent
: 수정 후 저장
[oracle@rac1 ~]$ . oraenv
ORACLE_SID = [racdb1] ? 엔터
The Oracle base for ORACLE_HOME=/u01/app/oracle/product/11.2.0/dbhome_1 is /u01/app/oracle
> SID에 엔터치면 자동으로 위치 기본값이 나온다.
[oracle@rac2 ~]$ vi /etc/oratab
+ASM2:/u01/app/11.2.0/grid:N # line added by Agent
racdb:/u01/app/oracle/product/11.2.0/dbhome_1:N # line added by Agent
↓
+ASM2:/u01/app/11.2.0/grid:Y # line added by Agent
racdb:/u01/app/oracle/product/11.2.0/dbhome_1:N # line added by Agent
racdb2:/u01/app/oracle/product/11.2.0/dbhome_1:N # line added by Agent
: 수정 후 저장
[oracle@rac2 ~]$ . oraenv
ORACLE_SID = [racdb2] ? 엔터
The Oracle base for ORACLE_HOME=/u01/app/oracle/product/11.2.0/dbhome_1 is /u01/app/oracle
> SID에 엔터치면 자동으로 위치 기본값이 나온다.
> 이제 RAC 공부를 할 수 있다.
'Oracle 11g > RAC' 카테고리의 다른 글
| 99 RAC GRD, Cache Fusion (1) | 2024.03.07 |
|---|---|
| 98 RAC RAC STAT, srvctl, OCR, Vote Disk, LOAD BALANCING, CTF, TAF (3) | 2024.03.06 |
| 96-2 그리드 삭제 후 설치 시 (0) | 2024.03.04 |
| 96-1 Grid 11g 설치 (3) | 2024.03.04 |
| 95-3 Oracle Enterprise Linux 5.6 설치 (0) | 2024.02.29 |